The top navigation bar (header) in the Monitoring module provides a set of powerful functions designed to efficiently manage and interact with your articles. These tools allow you to categorise, adjust and distribute content directly from the main view.
1. Move to #
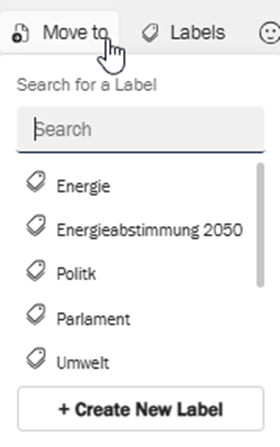
The “Move to” function enables you to relocate selected articles into specific label folders within your left sidebar. This is a primary method for organising articles into distinct categories or projects.
- Purpose: to physically move an article from its current location (e.g. an inbox sub-folder) into a designated label folder. An article can only reside in one label folder at a time.
- Usage:
- Select one or more articles by checking the box next to them in the central article overview.
- Click the “Move to” button in the header bar.
- A dialog or sidebar will appear, listing your available label folders.
- Select the target label folder and the article(s) will be moved there.
- Create a new label directly and move the article to the new created label.
2. Labels #
The Labels function allows you to apply flexible, non-exclusive tags (labels) to articles. Unlike “Move to,” applying a label does not change the article’s physical location; it merely associates a keyword or category with it.
- Purpose: to tag articles with multiple relevant keywords or categories for easier filtering, searching and cross-referencing without altering their primary folder location. This also serves as the central point for managing your available labels.
- Usage:
- Select one or more articles by checking the box next to them.
- Click the Labels button in the header bar.
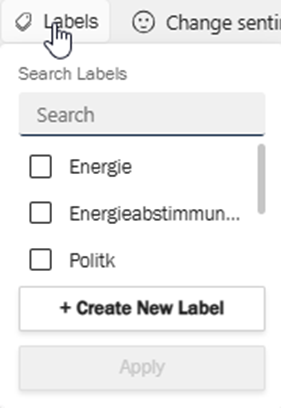
- A dialog will appear (as shown in the screenshot below), presenting a list of your existing labels:
- Search for a label: use the search bar at the top of the dialog to quickly find an existing label by typing its name.
- Select existing labels: click any of the listed labels (e.g. “Energy”, “Energy vote 2050”, “Politics”, “Parliament”, “Environment”) to apply them to the selected articles.
- Create a new label: if the desired label does not exist, click the “+ Create New Label” button at the bottom of the dialog. Enter a name for your new label and it will be added to your list of available labels and applied to the selected articles.
- Once labels are selected or created, they will be applied to the chosen articles and visible in the article’s metadata (in the detail view) and can be used as filters.
3. Change sentiment #
This function provides the ability to manually adjust the sentiment classification of an article if the automated sentiment analysis is incorrect or missing. Sentiment helps in quickly gauging the overall tone of an article.
- Purpose: to accurately reflect the emotional tone (positive, negative, neutral, ambivalent) of an article, enhancing analytical precision.
- Usage:
- Select one or more articles.
- Click the Change sentiment button.
- A dropdown menu or dialog will appear, offering the following options:
- Positive: indicates a favourable tone.
- Negative: indicates an unfavourable tone.
- Neutral: indicates an objective or factual tone.
- Ambivalent: indicates a mixed or unclear tone.
- Reset Sentiment: reverts the sentiment to its original (or system-determined) state.
- Select the desired sentiment. The change will be immediately reflected for the article.

4. View source #
The View source function allows you to access the original content of a selected article directly, either as a PDF file or on its original online platform.
- Purpose: to review the full, unedited source of an article for comprehensive understanding or verification.
- Usage:
- Select a single article.
- Click the View source button.
- Depending on the media type (e.g. print, online), the article will open in a new tab or window as a PDF document or redirect you to the original online publication.
5. Share #
The Share function enables you to distribute selected articles to others through various integrated sharing mechanisms.
- Purpose: to easily disseminate relevant articles to colleagues, stakeholders or external platforms.
- Usage:
- Select one or more articles.
- Click the Share button.
- A menu or dialog will appear, presenting available sharing options (e.g. email, export, internal platform sharing). Select your preferred method and follow the prompts.
6. Mark Read / Unread #
This toggle function allows you to manually change the read status of articles, helping you manage your workflow and focus on new or pending content.
- Purpose: to manage your personal read status for articles, differentiating between content you have processed and content that still requires your attention.
- Usage:
- Select one or more articles.
- Click the Mark unread (or Mark read, depending on the current state) button.
- The status of the selected article(s) will toggle accordingly. Read articles typically appear dimmed or without a bold indicator in the list.
7. Delete #
The Delete function allows for the permanent removal of selected articles from your view within the Monitoring module.
- Purpose: to remove irrelevant or duplicate articles from your workspace.
- Usage:
- Select one or more articles by checking the box next to them.
- Click the Delete button (often highlighted in red) in the header bar.
- A confirmation dialog will typically appear, asking you to confirm the deletion, as this action is usually irreversible. Confirm to proceed with the deletion.


